A New Look with Archaic Tools
June 2022
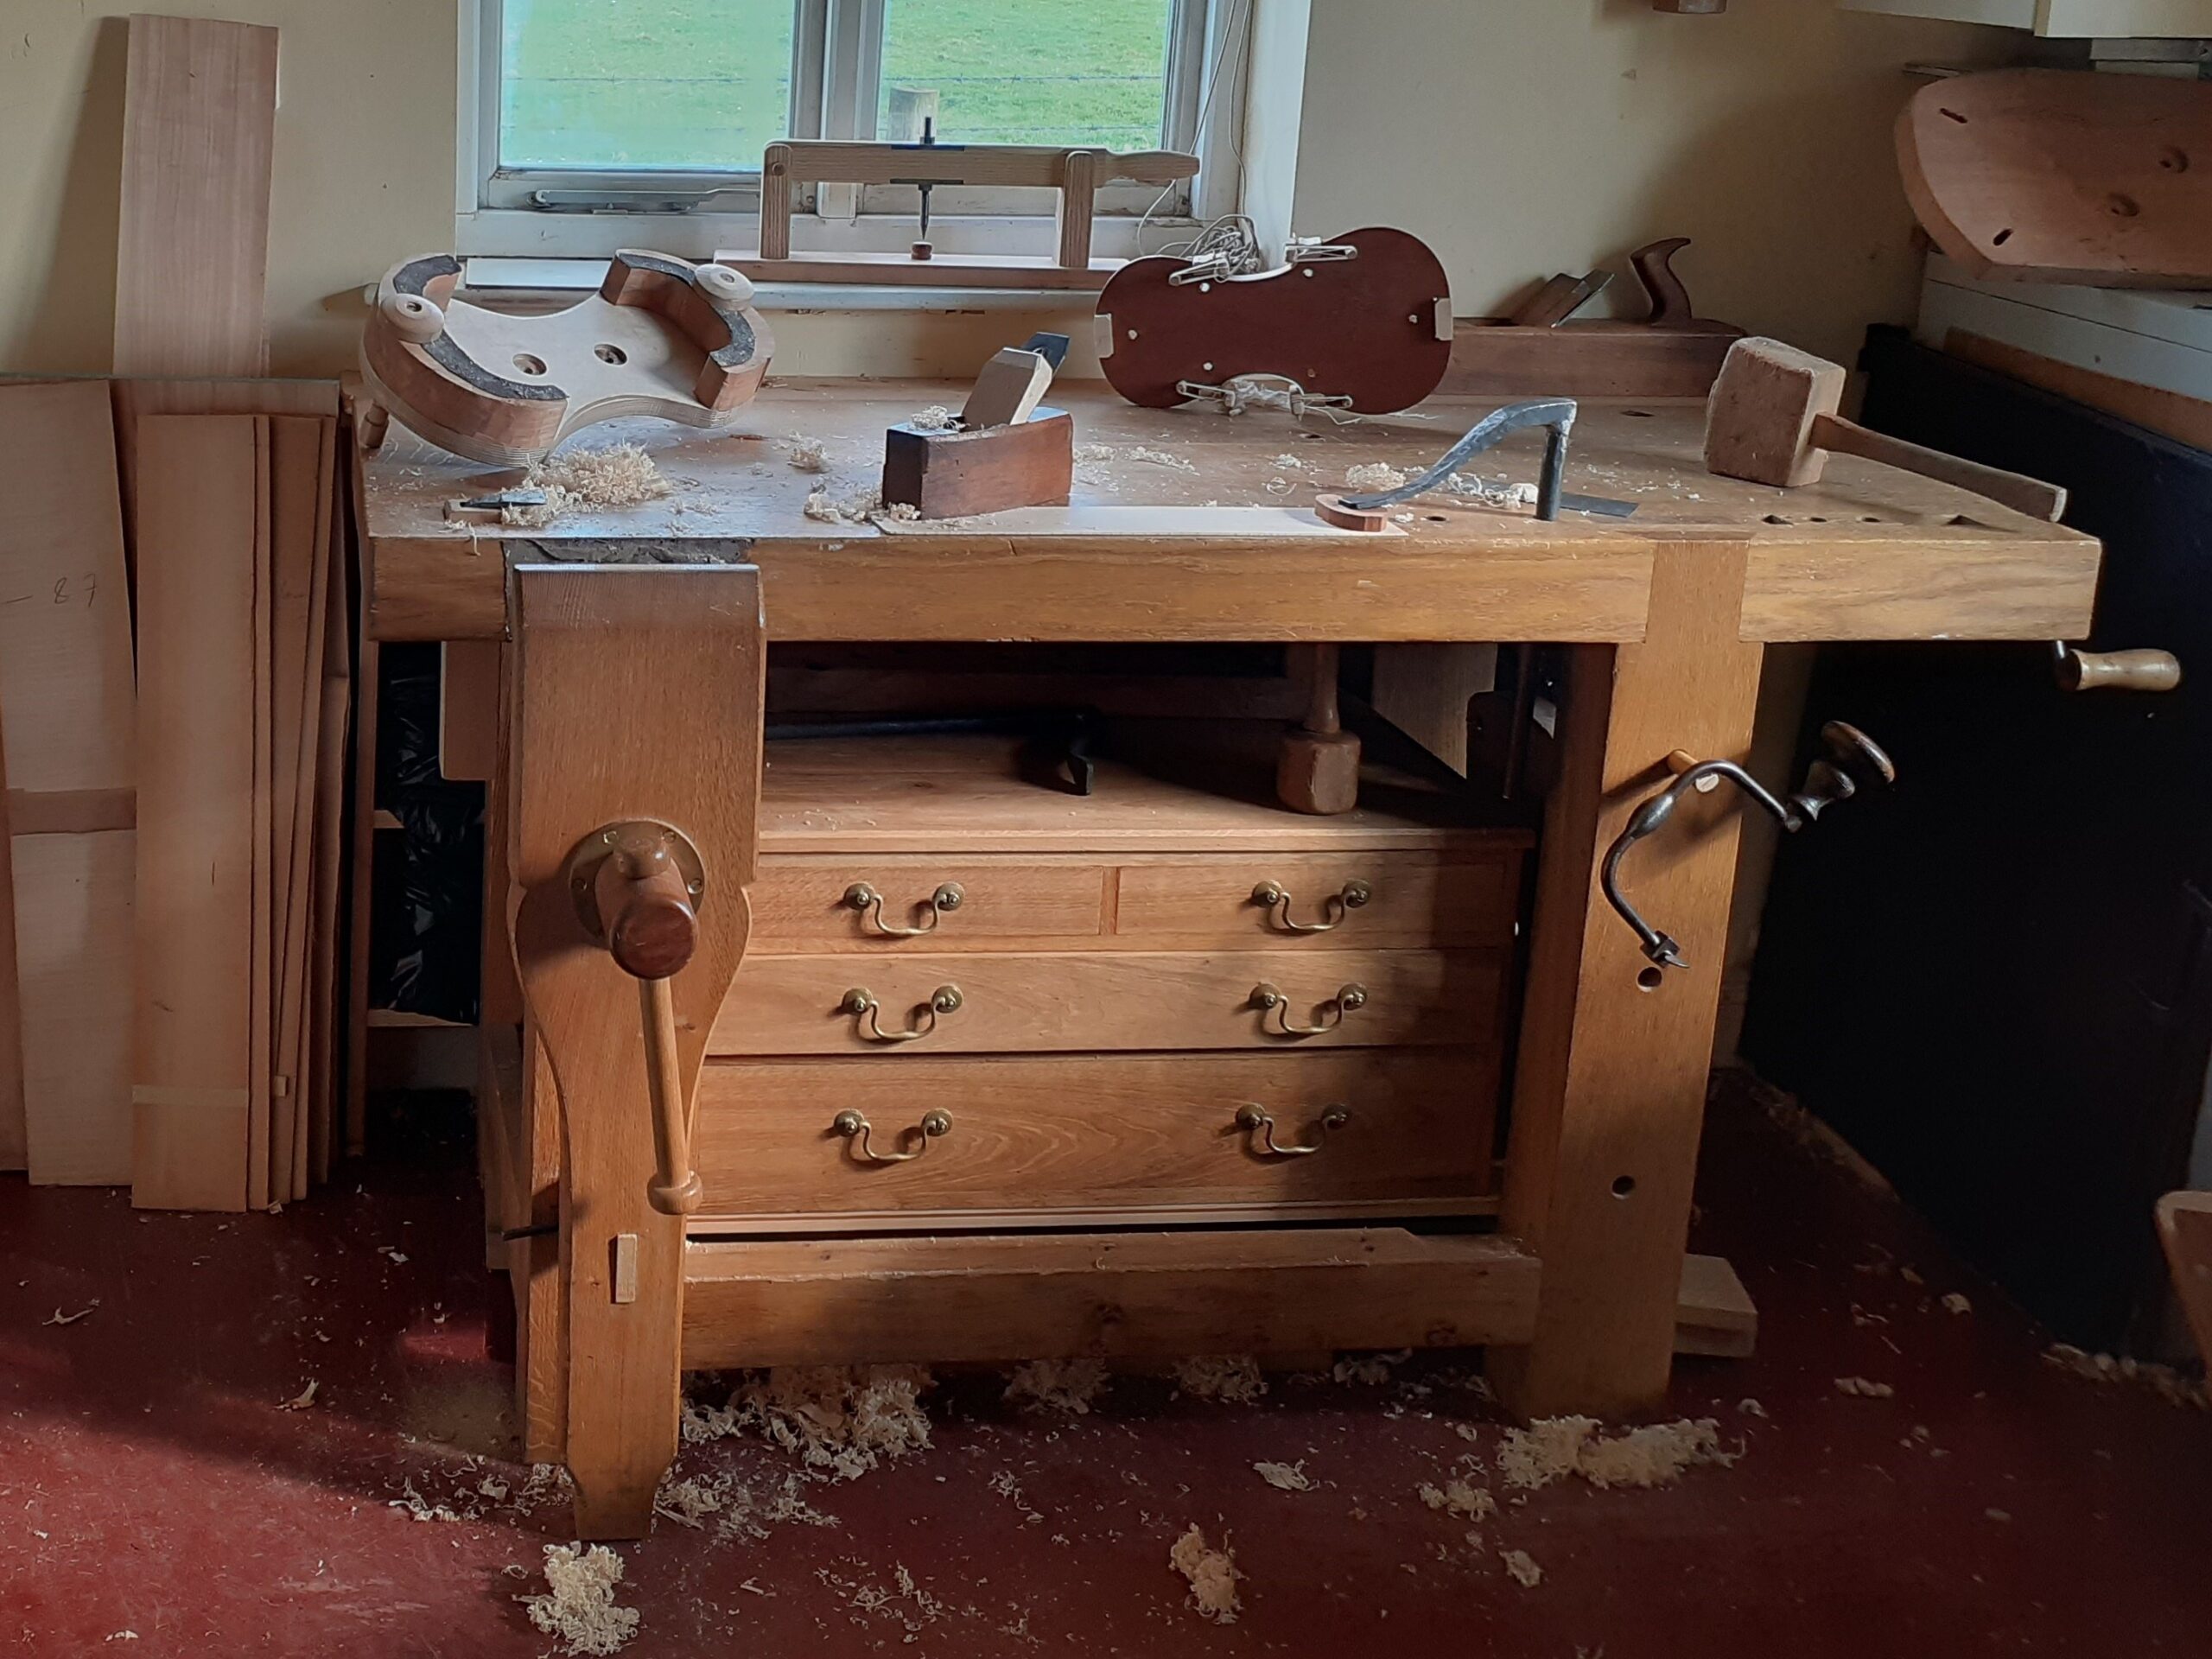
Over the last couple of years, my workshop has got to look a little different. The most obvious change is the new workbench which I made in early 2020, modelled on benches being used in France around the middle of the 18th century, and illustrated in his books on joinery by the contemporary joiner and writer André Jacques Roubo. Whether the Italian violin makers of the classical period used similar benches, however, is an open question. The first reason for making the new bench was purely practical, to make a hefty bench that would function better than the old one, but I also wanted to try out work-holding techniques which might have been more like the ways of the 16th to 18th century violin makers, as part of my research into more authentic techniques of violin making.
In my twenties, I remember the head of the violin making school saying that what was so fantastic about violin making is that it hadn’t changed for hundreds of years, but in fact, it has, particularly in the tools we use and how we use them. Like other tool users, many contemporary violin makers are seduced by shiny new tools, particularly the carefully designed, high-quality ones produced by the exciting new tool makers. I admit I am not totally immune, but each time we use something different from what was available a couple of hundred years ago, we move away from understanding what they were doing back then. So, over the last few years I have been reassessing what tools I use and what effect they have on the instrument, which has yielded some interesting results.
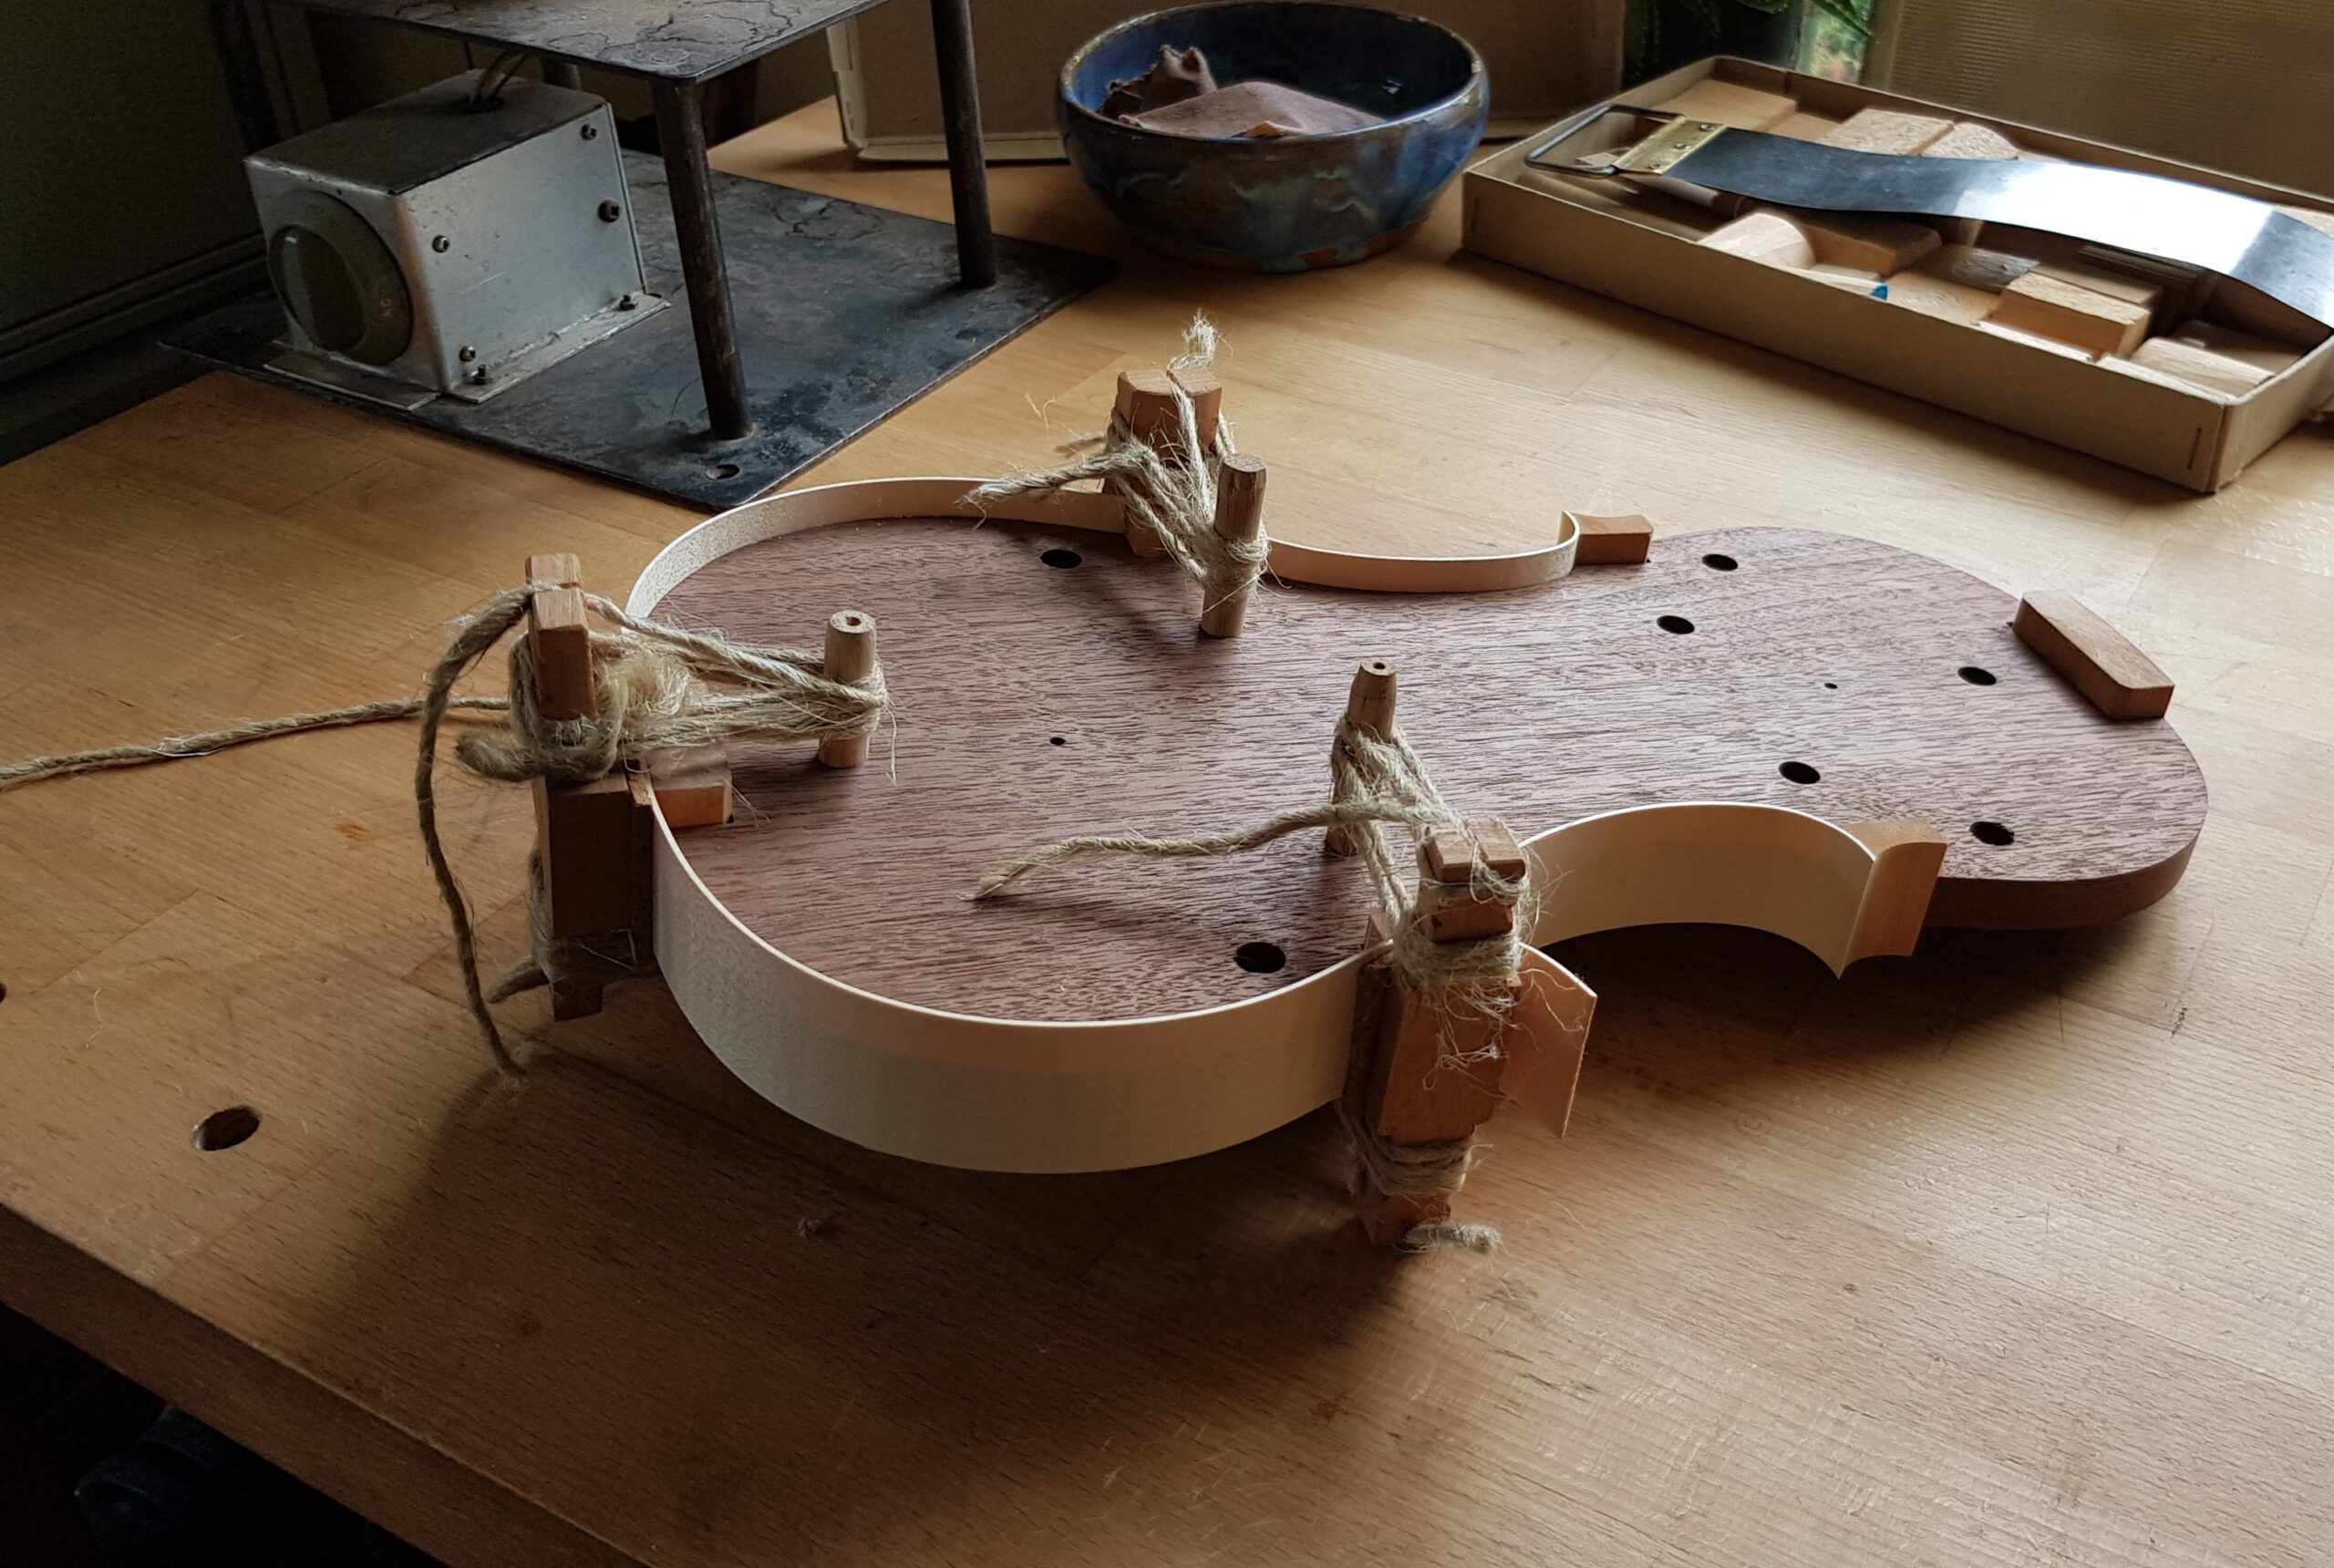
Though I am still trying new things out, these are my top five methods or tools. The first is tying the ribs onto the mould with pegs and string, which we know is how Stradivari did it, a method I have been using on the C ribs for twenty years or more and which is quicker and easier than using modern clamps, whilst allowing for flexibility in the outlines, a feature of many old Italian makers.
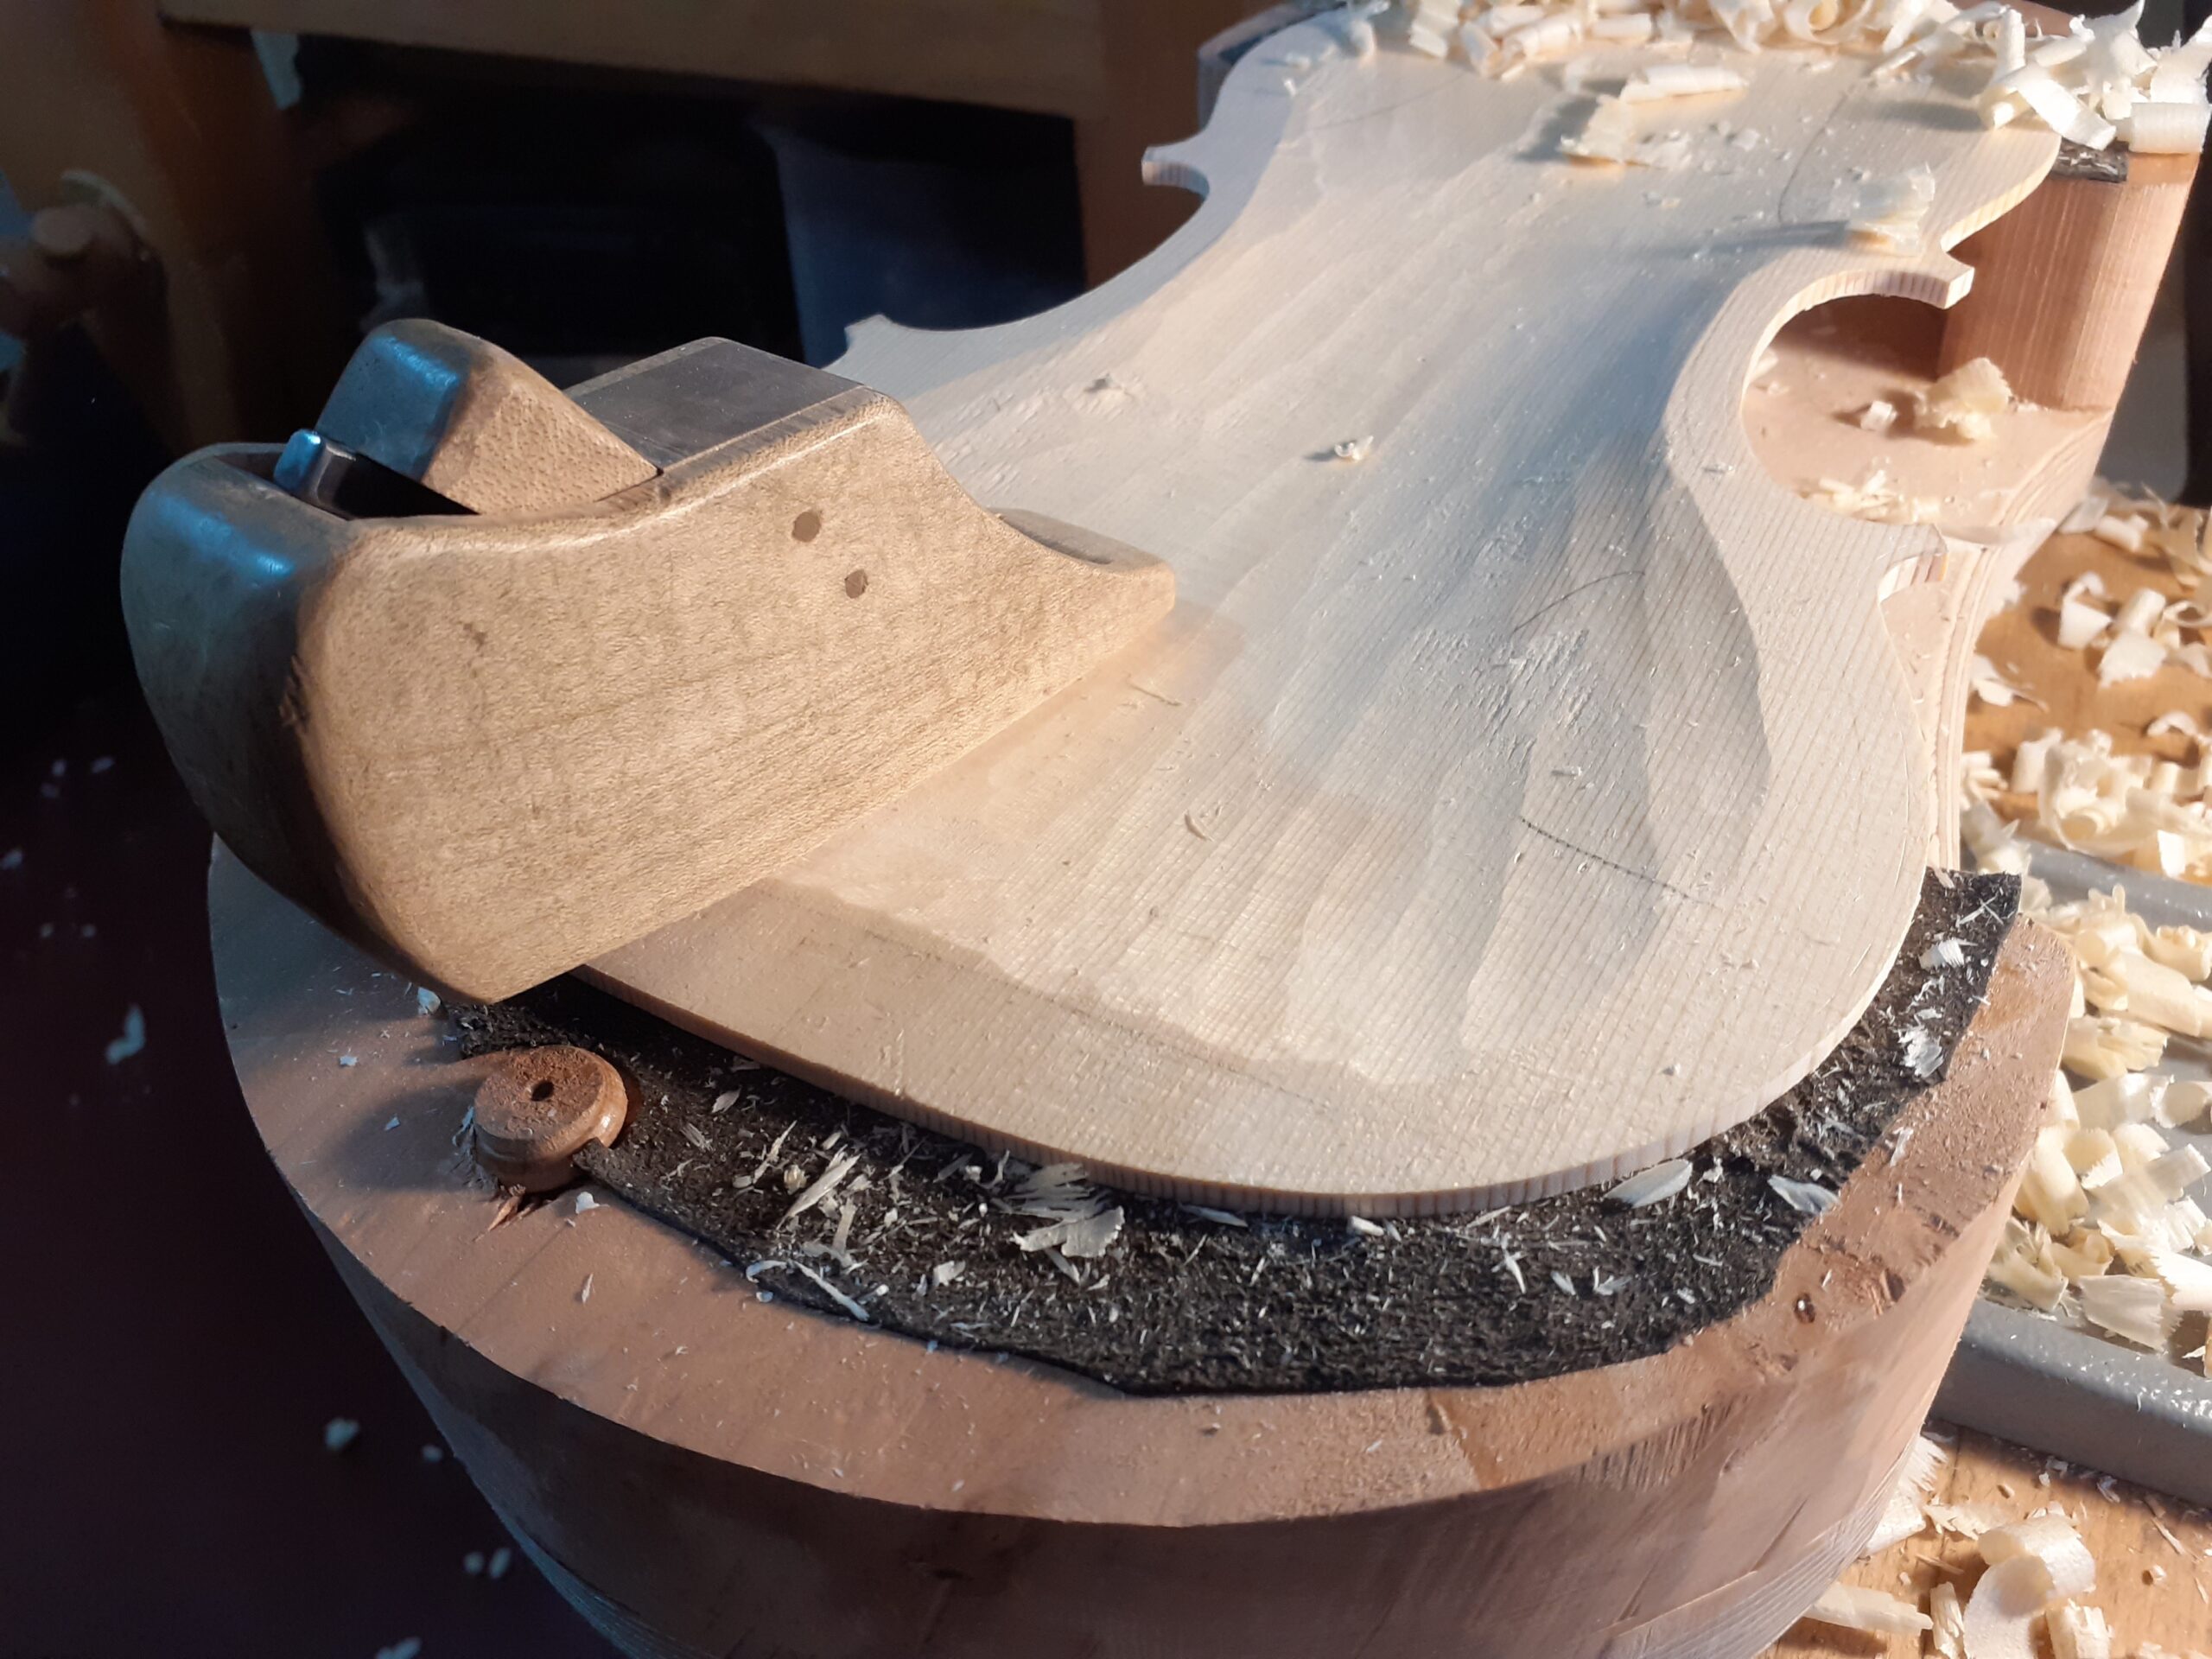
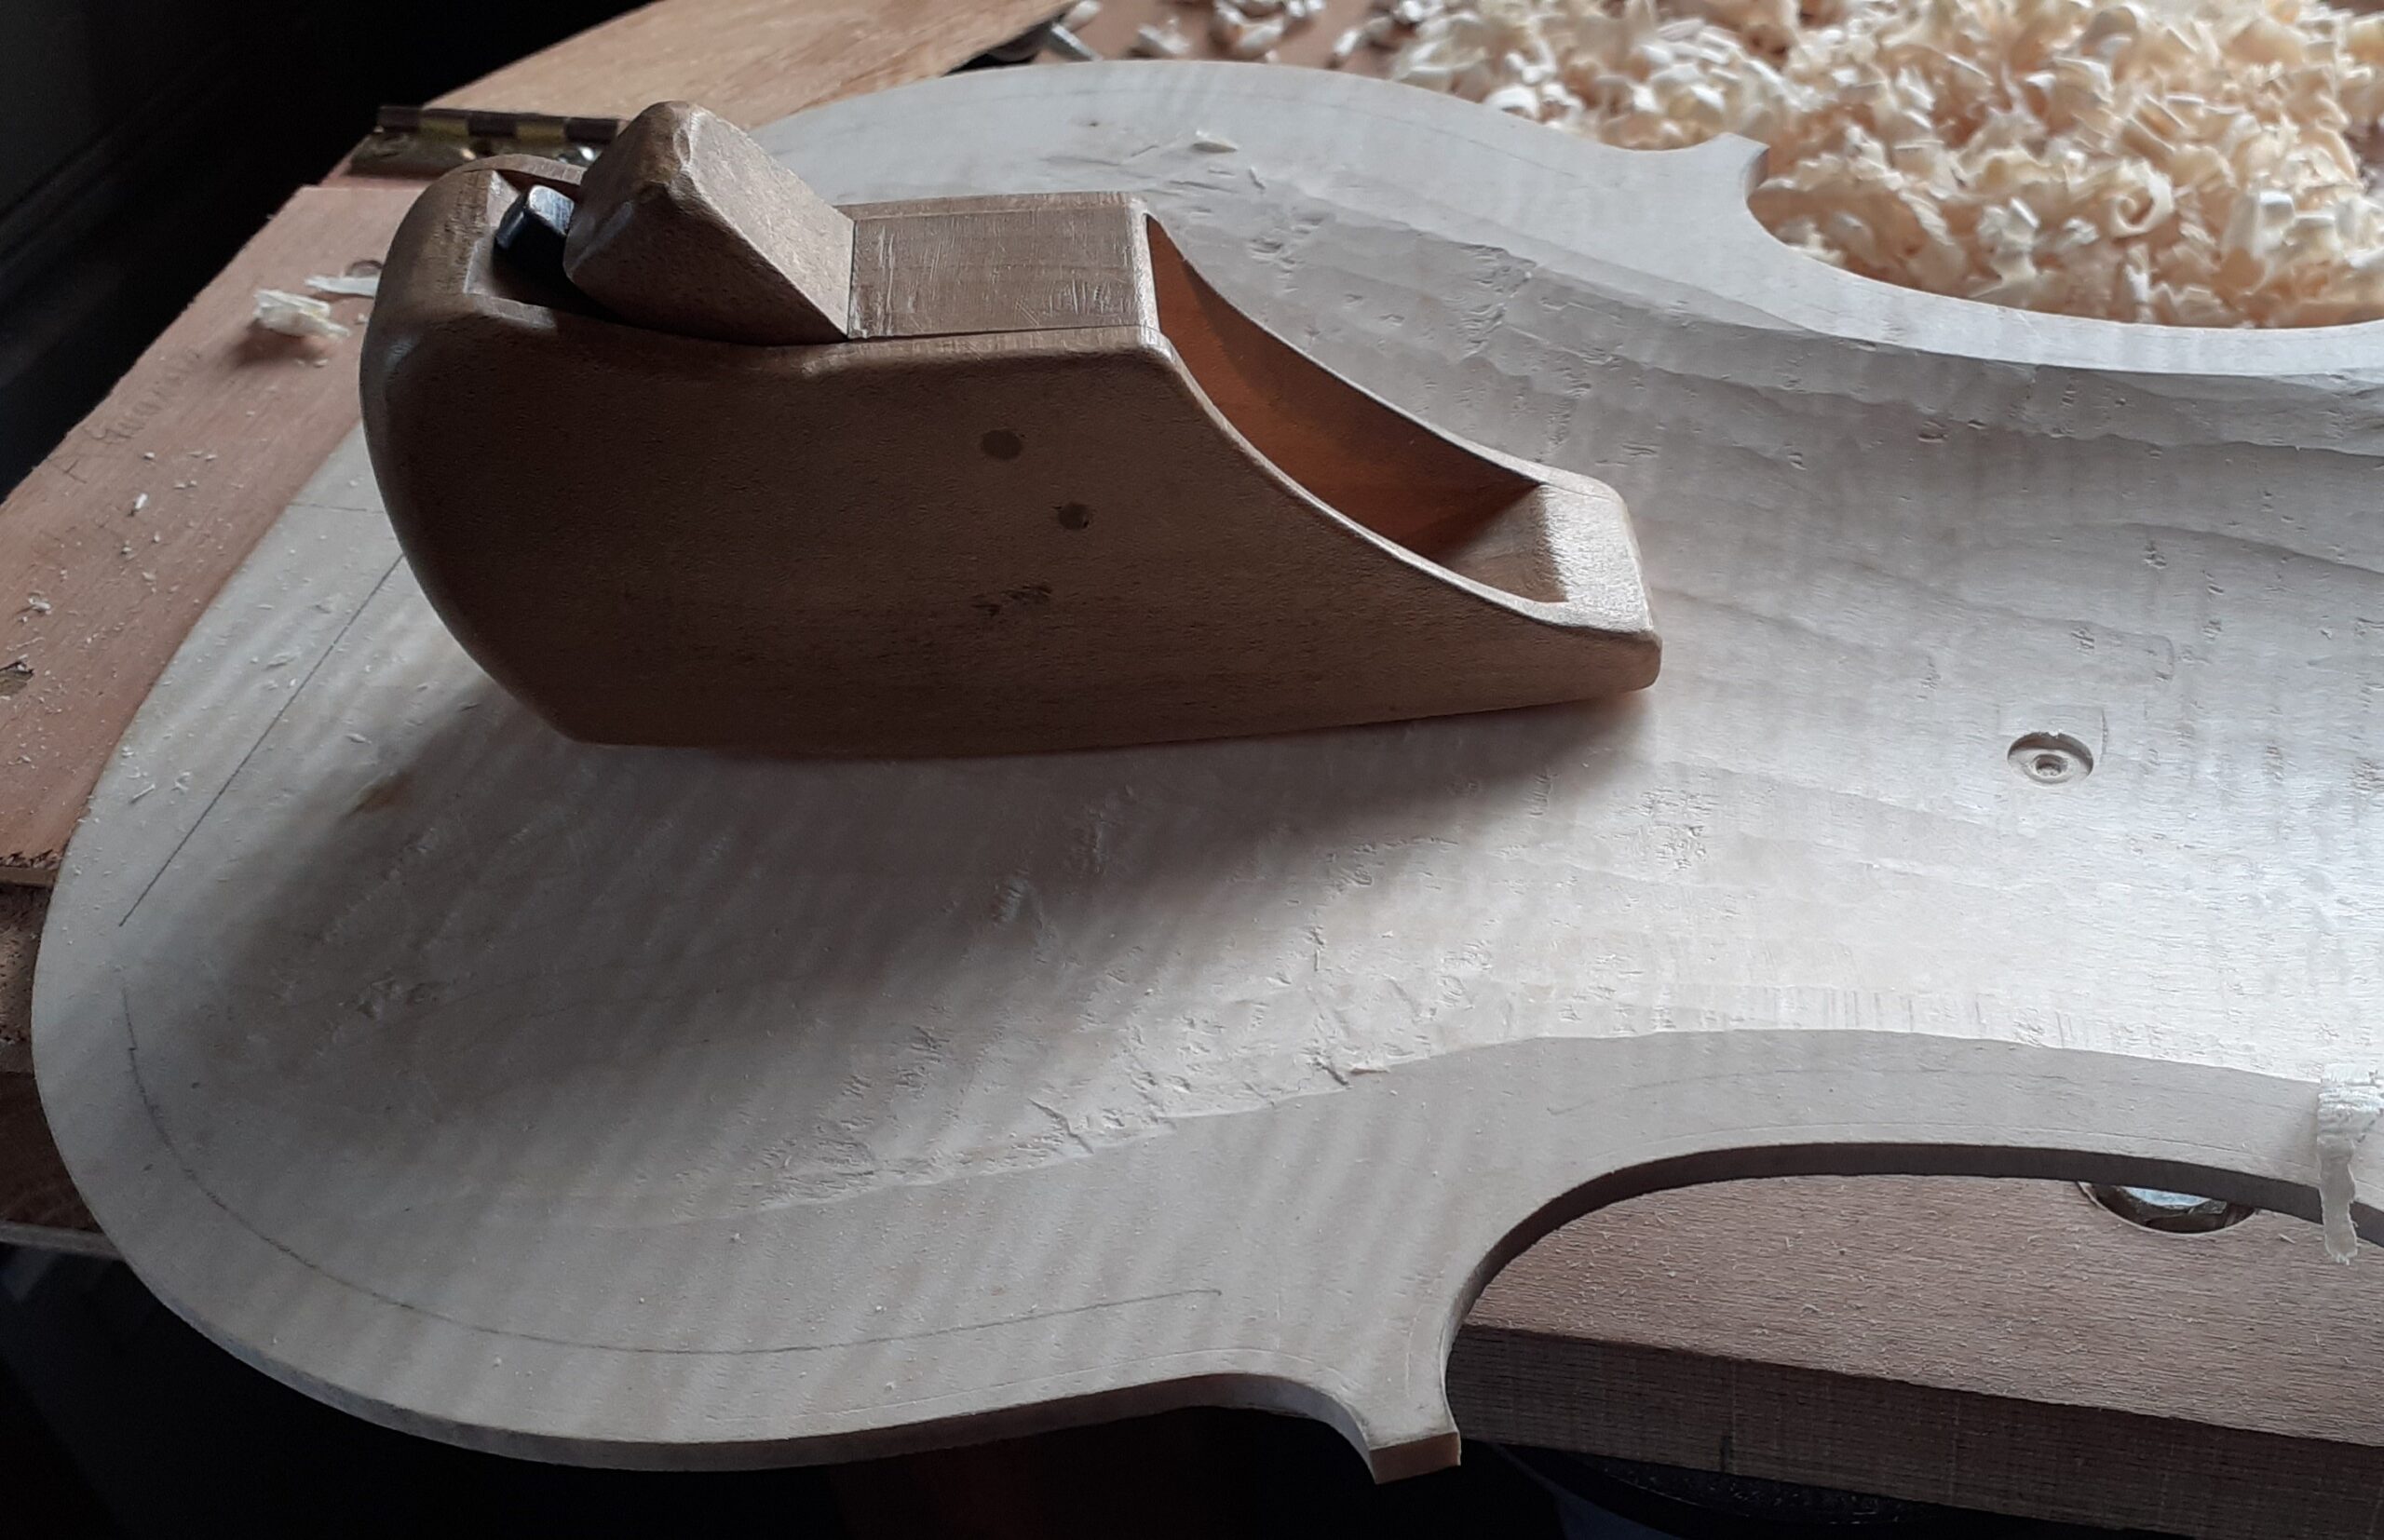
The second is using a scrub plane instead of a big gouge for rough arching and hollowing the back and belly. Unlike the gouge, the scrub plane allows quick and precise removal of wood, and the ability to adjust the blade means you can balance the thickness of the shaving with your own strength and stamina. Another advantage is that with smooth and flattish plane marks rather than gouged channels, the shape of the arching can be seen at an earlier stage, which encourages greater flow in the arching shapes.
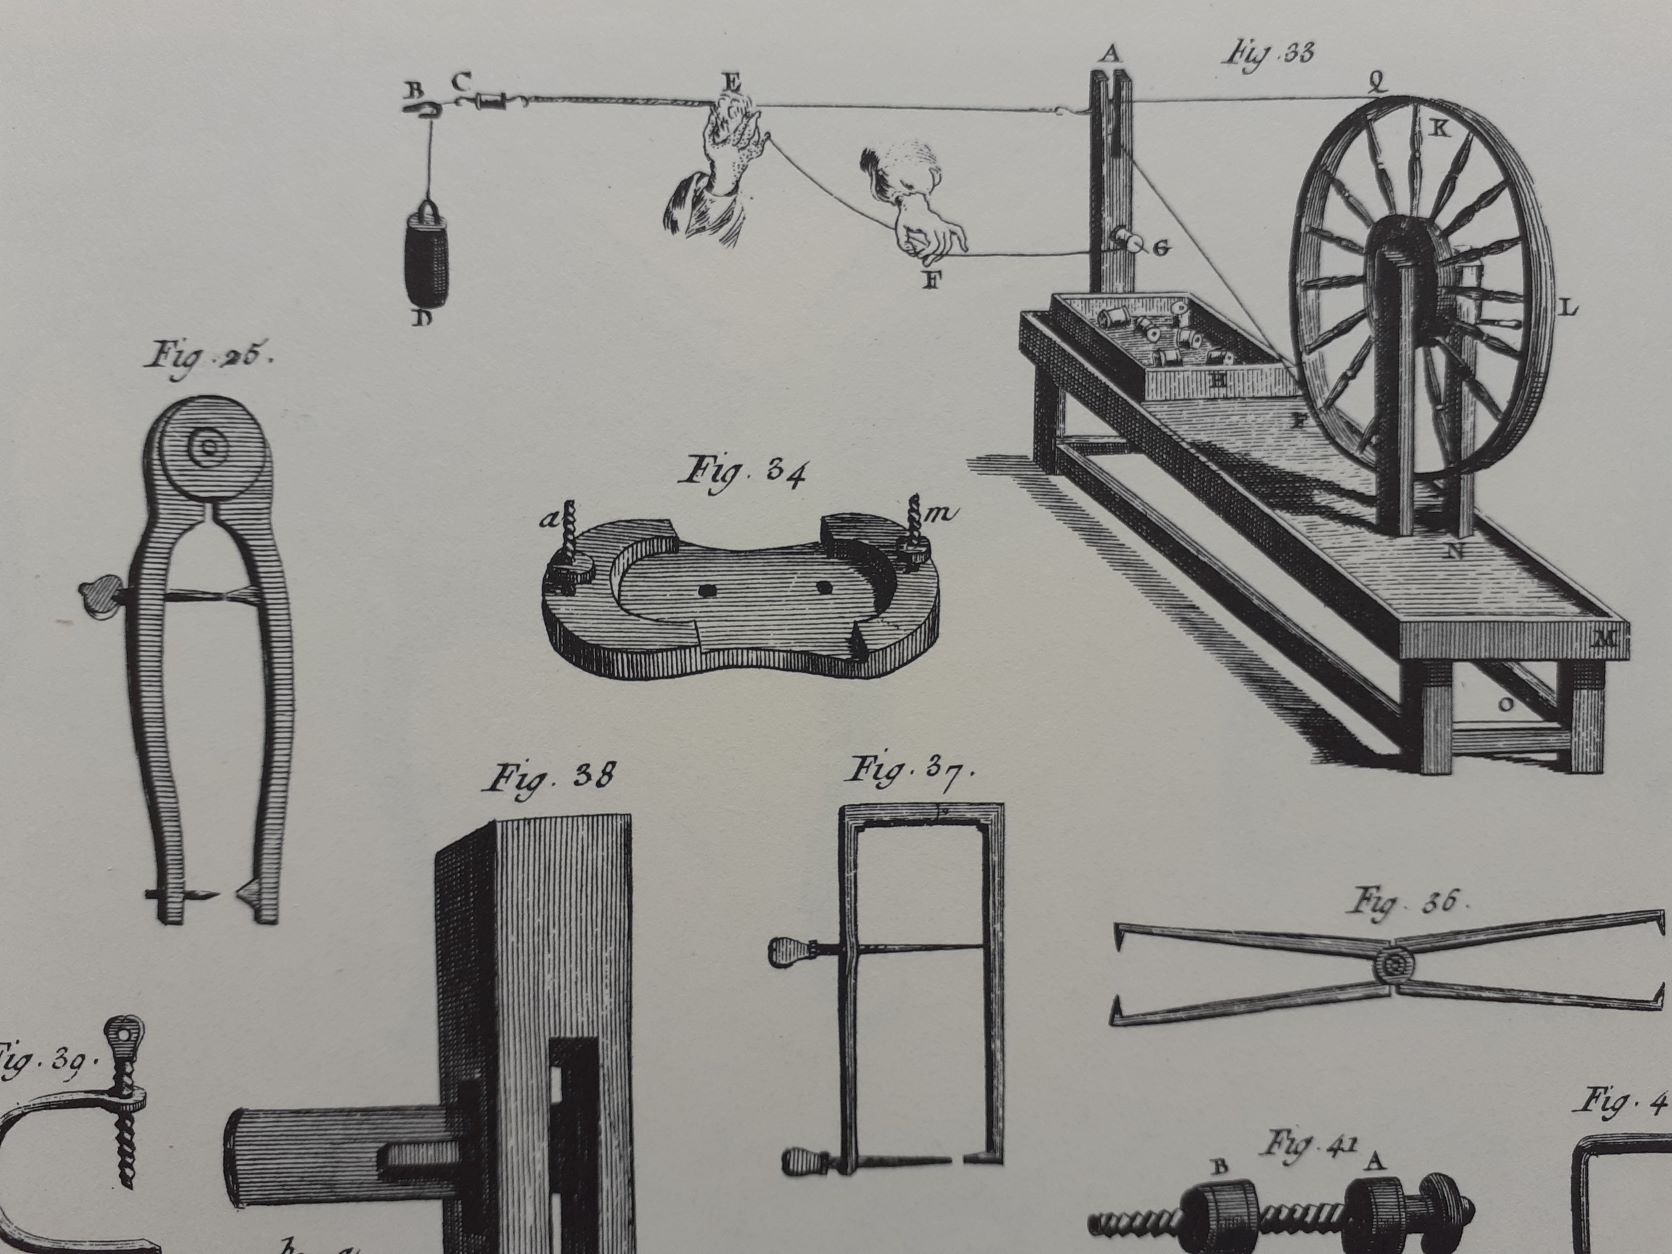
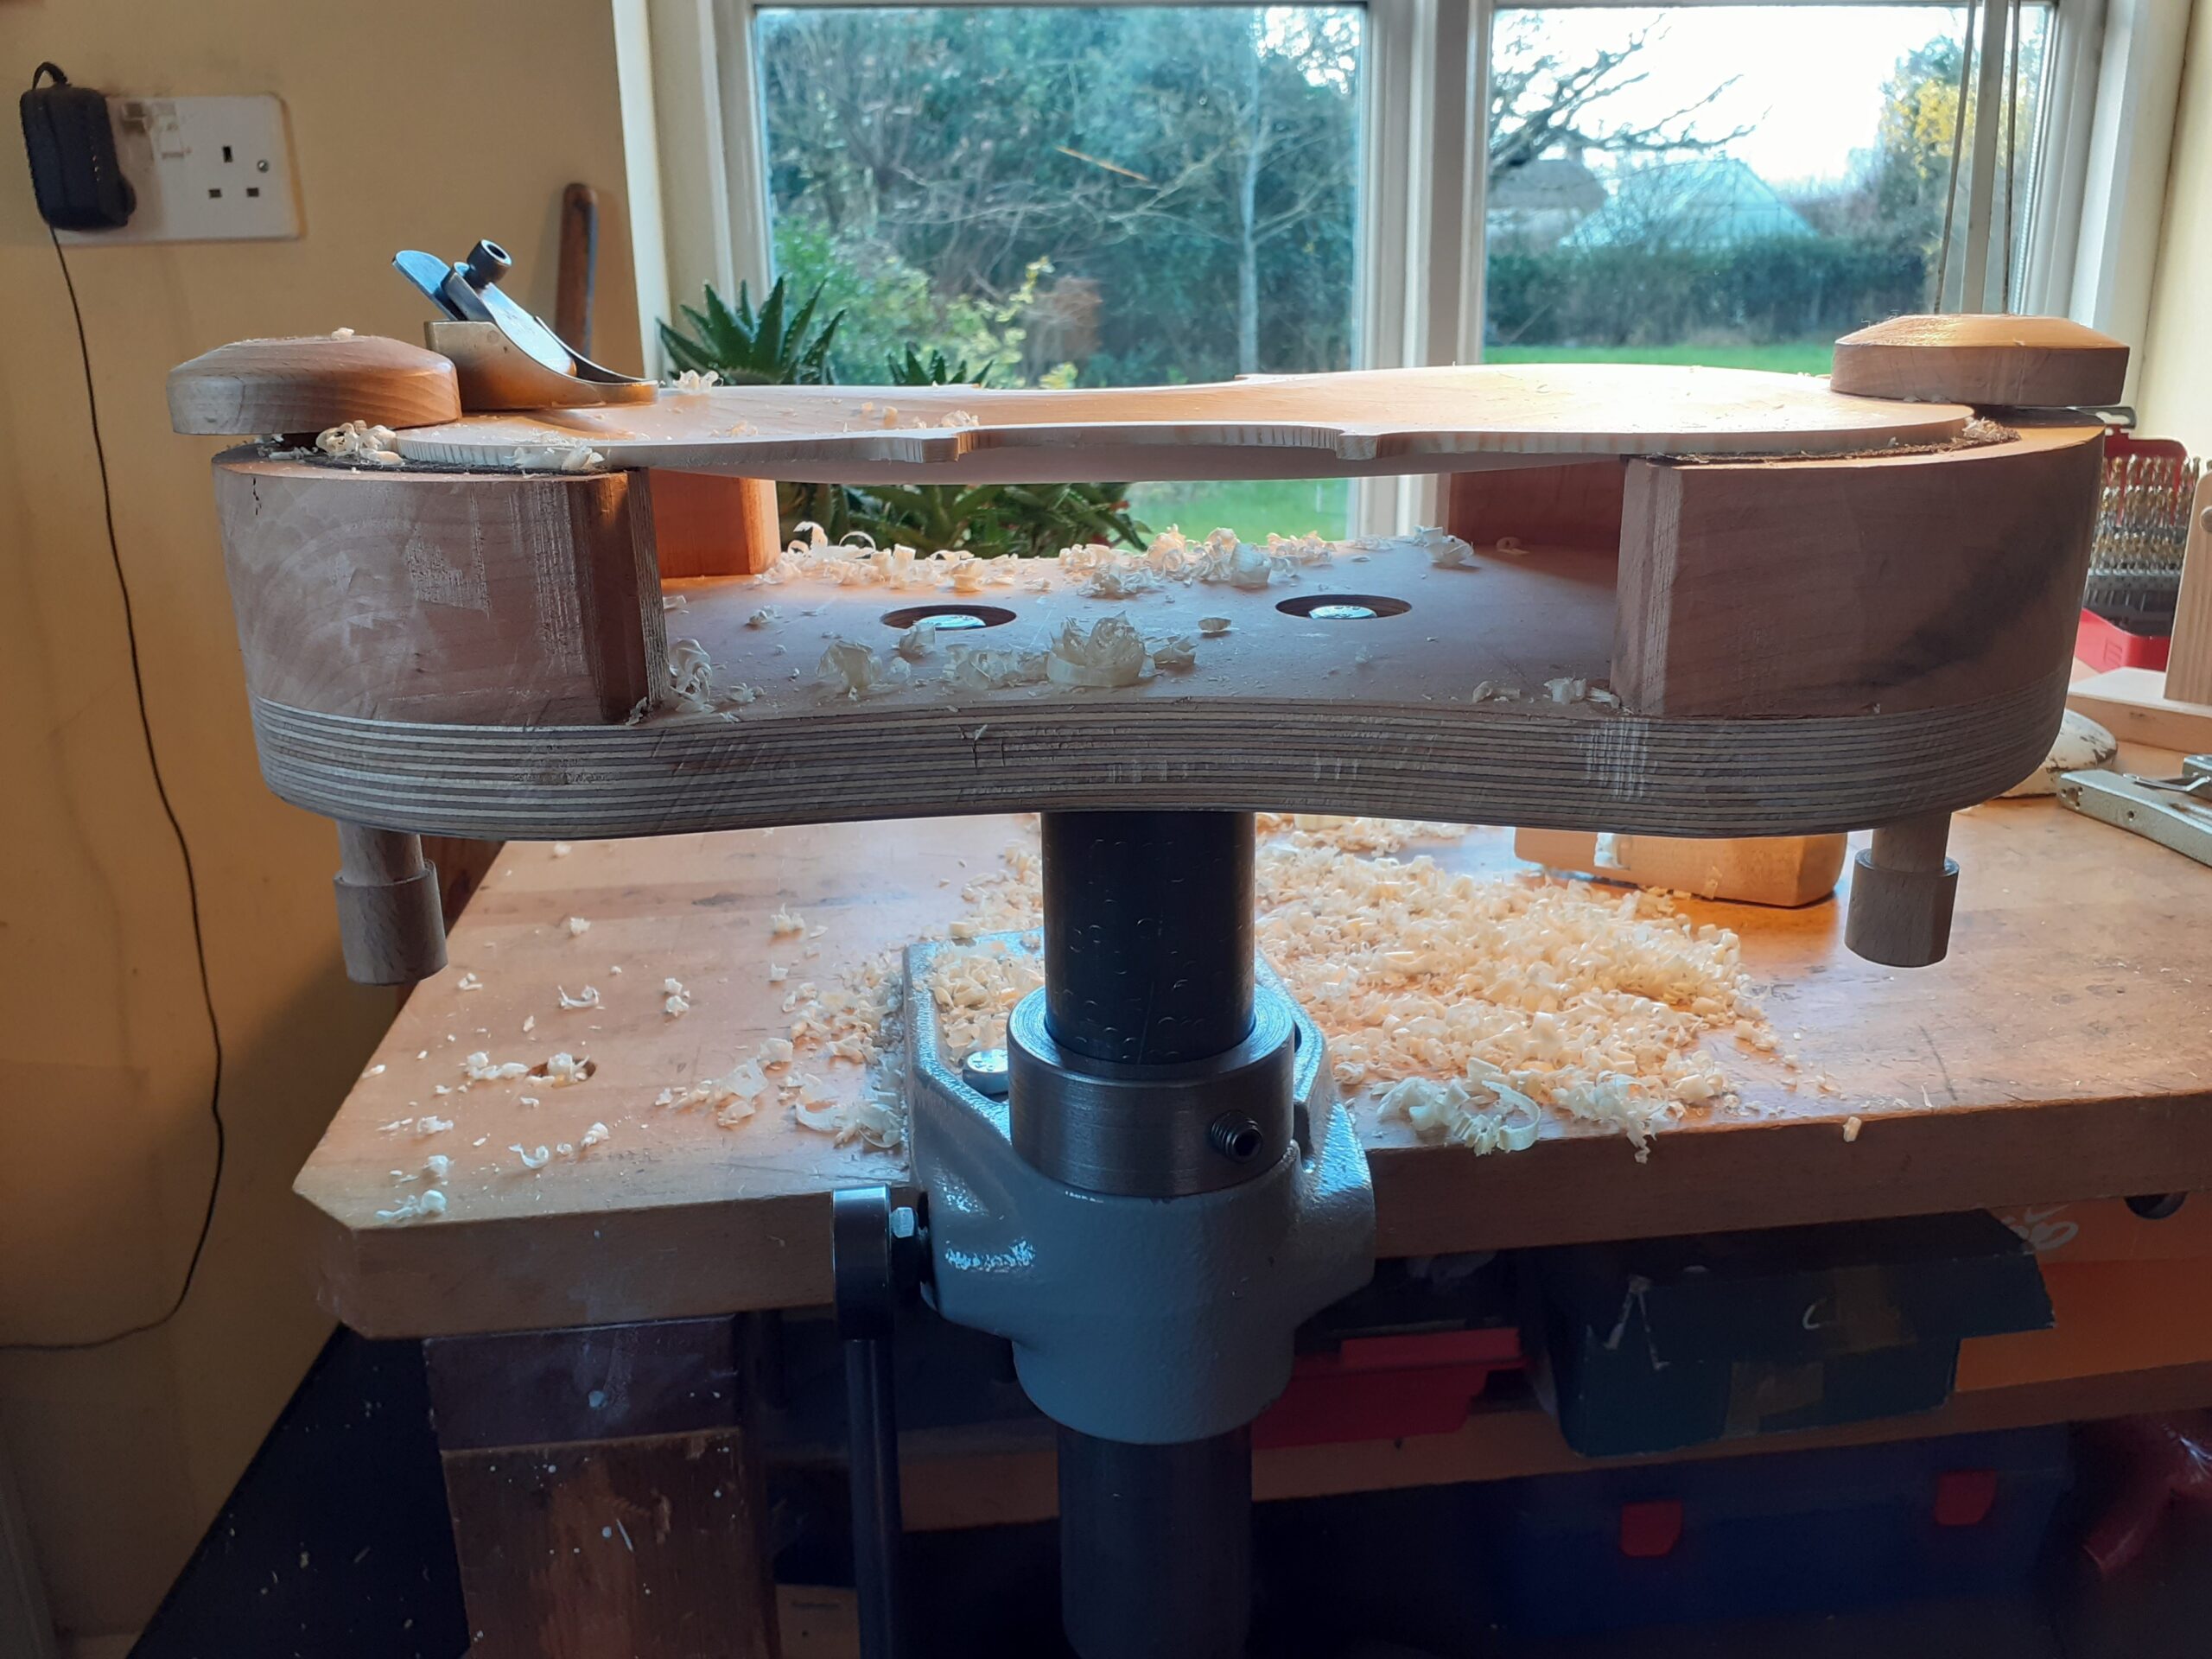
The third and fourth contenders are really holding devices, the simplest of which is a board with four nails poking through. This was depicted in Diderot’s Encyclopédie of 1751, and is used when arching the back and belly, the plate being held in place by the pushing the flat underside down onto the nails. Though not authentic, I mount this on a modern vice lifter, a device which allows the work to be rotated horizontally and be raised to any convenient height. For avoiding aches and pains, and in allowing freer movement of my body and with the tools, it has now become an indispensable tool in my workshop, despite there being no evidence to suggest its use in the past, though I am sure I could make something similar in a baroque style out of wood. Also used on the vice lifter is my hollowing cradle, another Diderot idea, which I have never seen another violin maker use. Although the wooden screws don’t look like a very secure method of holding the work, they are actually really effective, the other excellent feature of the contraption being the U- shaped pieces which support the plate underneath, providing support around to the widest point of the bouts, so the plate is held much more firmly and scarcely deflects under the tools when hollowing.
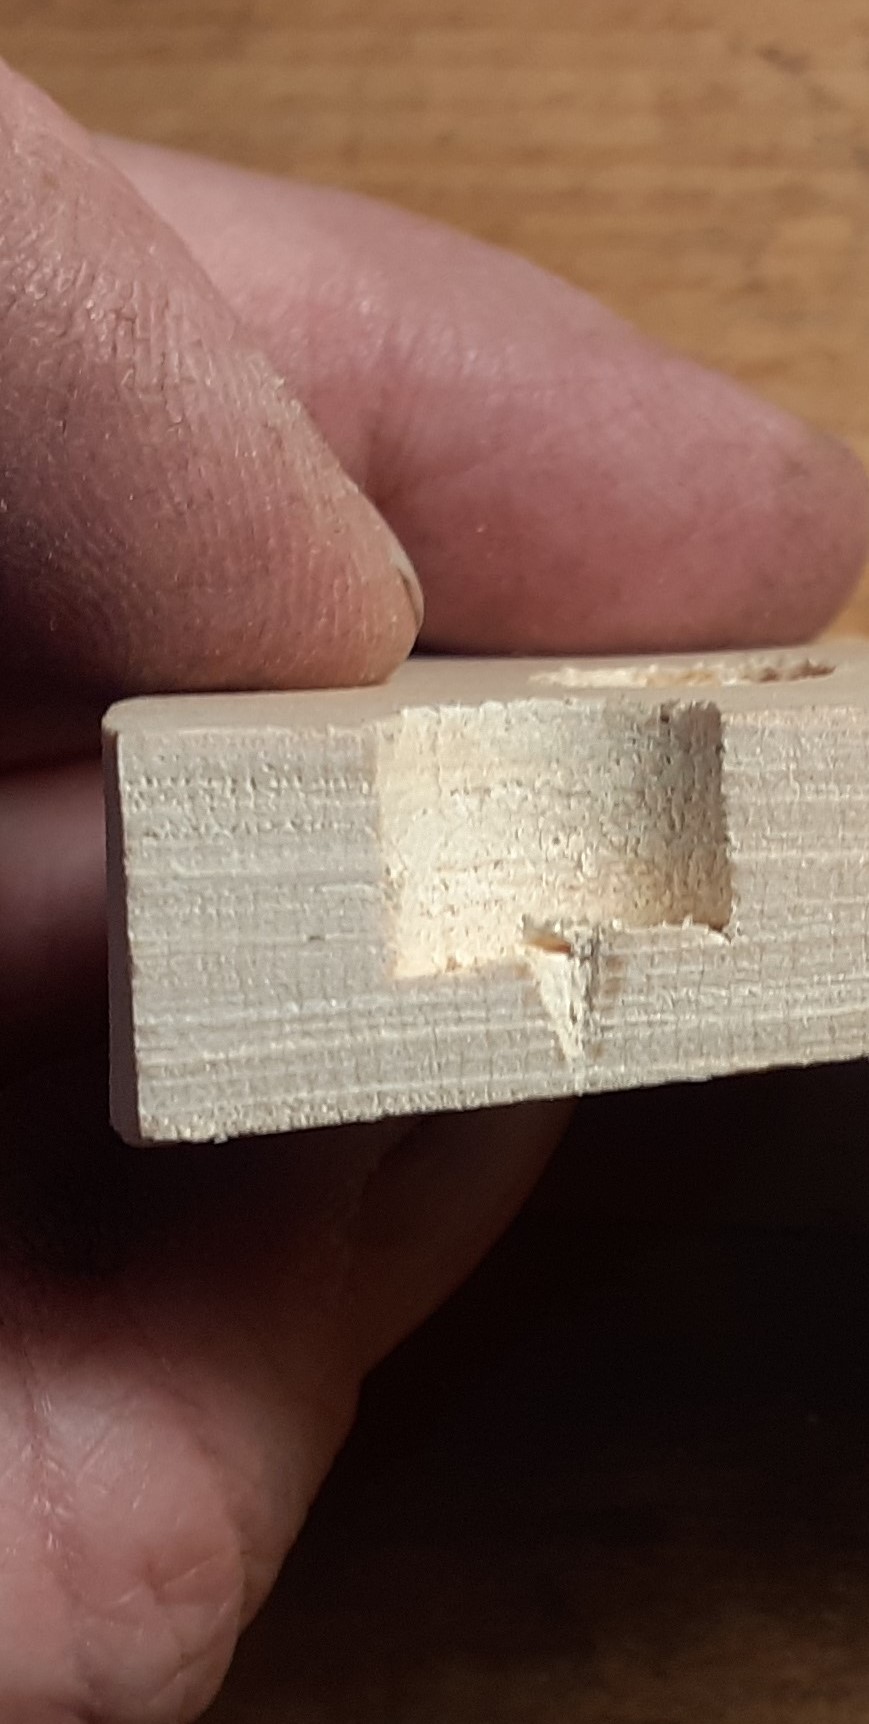
The fifth innovation is my favourite because it is a combination of methods, one leading on from the next, the second reinforcing the first. In some old instruments, including those of the Guarneri family, there is a conical hole in the back, a couple of millimetres wide on the inside reducing to just a pin prick on the outside. Known as a ventral pin, it is approximately in the middle of the back, but its purpose was unknown. The hole is way too deep to be a marking out hole, so to me, it seemed to be more likely to have some connection with the thicknessing. Since the shape of the pin hole matches the central pin of a bit that you drill holes with, I reasoned that if the central pin is just a little longer than the final thickness of the back, this could be used to give a guide to the back thickness when hollowing. So, after the outside of the back is complete, I could drill from the inside cutting a cylindrical hole and when I feel the point of the drill bit on the outside of the back, stop. Then I could use the scrub plane to hollow the back until the main part of the hole had been planed away.
So in 2020, this is what I did with a Guarneri del Gesu model violin. It certainly felt scary drilling into the nice back which was well on its way to completion. Once done, I went straight to the scrub plane to do the hollowing. Unlike when using a gouge when you work across the instrument, with a scrub plane you work along the grain, so after marking the position of the top and bottom block on the inside of the back to avoid removing any wood here, you use the plane along the length of the back, the curvature of the plane’s sole helping to get the required shape. I had been doing the hollowing like this for about ten years, but the presence of the hole in the centre allowed me to continue planing without having to stop and check, which really helped in removing most of the wood speedily. If, however, you were to hollow with a gouge, the ventral hole would only be of any use an inch or two either side of the hole; it is really the combination of the ventral hole and the round- soled scrub plane used longitudinally that creates the advantage.
Redeveloping these old methods and some speculative ones of my own has been a real buzz, and encouragingly, have been met with enthusiasm by other instrument makers. Besides being interesting technically and historically, these methods have proved to be no more difficult or slower than the usual modern techniques, in fact, with one exception, the opposite is true, these methods are easier, quicker and more precise, freeing the mind to concentrate on the overall shape.
There is, of course, a ready musical parallel with the use of original instruments, the music of the time being written with those historic instruments in mind, including all their peculiarities and pitfalls. Whether or not you are a player of period instruments, it cannot be denied that by using them, by recreating the sound of the past, by struggling perhaps with the instruments of the time, overcoming the problems and relishing their qualities, you get closer to the original intent.
